We are always looking for creative and wonderful ways to use our dried flowers. So, we thought we would try our hand at making Dried Flower Soap. Believe it or not, soap making is not as complicated as we first thought.

Soap is an amazing gift that will actually be used! You really can't go wrong with a pretty, heavenly smelling Dried Flower Soap bar whether it's used for skincare or as a decoration. The fact that it's a thoughtful handmade gift makes it all the better.
Fancy creating some Pinterest worthy soaps for your nearest and dearest? Follow our 5 easy steps:
Materials you will need:
- Dried Flowers
- Melt & Pour Crystal Soap Base
We purchased 1kg of Clear Soap Base and 1kg of Goats Milks base which you can get from The Soap Kitchen, both bases are Vegan. - Silicon Soap Mold
Esty have a wide range of these, it's entirely up to you to select what shape you want your soap to be. - Essential Oils
We used Lavender Oil from Botanics - Pyrex Jug (for melting the soap base)
- Alcohol Spray (we read this is good for eliminating bubbles but we don't feel it is a necessity)
- Access to a microwave
Optional:
- Gift Wrap
- Brown String

Step 1: Select your Flowers & Place in Mold
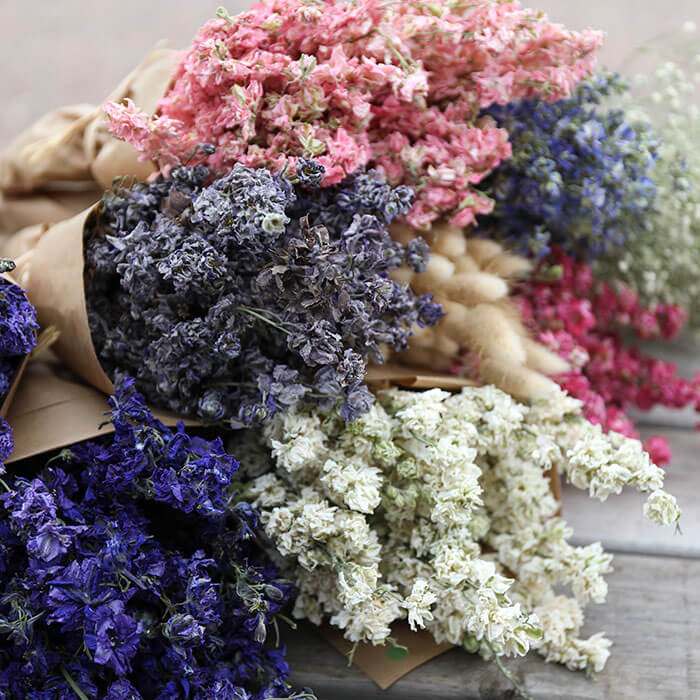
We grow a beautiful array of dried flowers on our Shropshire farm, so we found it hard to choose which ones we wanted to use in our soaps. We decided to go for a variation and selected, Rose Buds, Pink and White Rhodanthe, Lavender, Lavender Grain, Calendula Petals (Our Honey'b and Ginger Snap petals), Helichrysum and Delphiniums.
Place your mould on a flat surface, and start placing your chosen dried flowers face down into the mould sections. It's important that they are face down as they will be on top when you have completed the soap.

Top Tip: Calendula Petals retain their colour beautifully and add a lovely texture to the soap. The other flower colours faded slightly, and when we read into it afterwards we found this is down to the exposure of lye in the soap. This doesn't prevent you from using them, we just want you to be aware.
Step 2: Melt Clear Soap Base
How much you melt is depending on how many soaps you want to make (we made six). Cut half the clear base into squares (the other half can be sealed up and used at a later date) and begin melting it in 30 second blasts in the mircowave, stirring in between. You can always add more to the melting process if you don't feel you have enough. It took 1 minute 30 to melt the required amount. Once melted carefully pour the clear soap into your soap moulds ensuring that the flowers are fully covered, filling up half the mould is spot on.
At this point we sprayed the alcohol spray, it did seem to limit some of the bubbles. Leave the soap to set for 10 minutes, whilst it is setting start to prep step 3.
Top Tip: The soap does set quite quickly so make sure you pour it straight away when you remove from the microwave.

Step 3: Melt Goats Milk Soap Base
Follow the same melting process as Step 2 but this time, once melted, add the essential oil scent and mix it up. We opted for 5 drops of lavender oil and felt this give the desired scent. Gently pour on top of the first layer of flowers, and then wait for it to dry.
Pop a timer on for 1 hour, and go and enjoy a cuppa!

Step 4: Remove from Mould
This part we found to be the most satisfying as the soaps pop right out without any required pressure and the reveal of your gorgeous masterpieces are such a nice surprise!


Step 5: Gift Wrap
We made use of some leftover gift wrap and also finished it with a brown string bow. You can gift the soaps separately or as a bundle, tied in brown string makes them look quite effective. Or you could go one step further and have your own little 'Handmade by' labels made. You can get as creative as you want with this step!

Create your Own Kits
We truly enjoyed this soap making experience and hope you do to! If you fancy getting creative with gifting this Christmas then you will want to explore the Create your Own Kits section of our website. You don't need any special skills to make any of these gifts, you will not be stuck for gift inspiration (you may even want to keep some for yourself!).
It's so lovely to receive updates on your latest Shropshire Petals DIY project, so don't forget to take some images of you crafting and tag us on social media.
Enjoy!
Love SP xX